Modular DCC microcontroller - BLE joystick module

The Bluetooth Low Energy (BLE) joystick module is an interface between the network manager (computer + JMRI) and the DCC control unit, which interprets the commands and generates the power signal to the rails.
This module transfers the serial information exchanged between the controller and the central unit. It memorizes control commands circulating on the serial port. Using a BLE joystick, it is possible to send new commands to drive the power cars.
The operating principle of this module is entirely based on learning:
- automatic detection and recording of the joystick's MAC address;
- automatic detection and memorization of all motrices controlled by JMRI.
This Bluetooth joystick (and its module) provides access to all the locomotives declared in JMRI, with no need for time-consuming parameterization. The joystick enables fingertip control of all locomotives and their associated functions.
Features
- memorization of the joystick by recording its MAC address (unique manufacturer's number stored in each PAD, enabling network protocols to address each piece of equipment individually);
- learning and memorizing the characteristics of locomotives controlled from JMRI (loco address, direction, speed, active functions);
- each joystick can simultaneously access up to four locomotives (via function buttons), selected from a list of all locos parameterized in JMRI. This selection can be changed on the fly at any time;
- pressing all four function buttons simultaneously generates an emergency stop and stops DCC signal generation.
Maturité :
Project status
Évolutions
Version 0.5

Operating principle
A NodeMCU ESP32 microcontroller placed between the computer and the DCC control unit intercepts exchanges over the serial connection in both directions. Natively managing Bluetooth, it is also in charge of the BLE connection with the joystick described below. It manages pairing and command reception. Depending on the manipulations performed on the joystick, it injects new instructions directly on the serial link to the control unit. Finally, all information is displayed on a small OLED screen controlled by an I2C bus.
In order to memorize all the locomotives described in DecoderPro, a python script launched from JMRI will be used to send all the locomotive characteristics to the module, which will store the information and be able to control them via the joystick. This script will be installed as a button accessible directly from DecoderPro's main interface, so that it can be executed with a single click. Locomotive data stored in the ESP32 is also updated as orders are sent from the locomotive control panel to JMRI (controller). Both network control solutions can therefore be used simultaneously:
- via the JMRI controller ;
- via the Bluetooth joystick.
The ESP32 is particularly well-suited to the functions offered by this module, as it already has all the necessary technological arsenal natively at its disposal:
- several UART serial ports,
- BLE connection,
- I2C bus management.
The only drawback to choosing the ESP32 is its 3.3V operation, requiring adaptation of the signals exchanged with the Arduino, which operates on 5V.
Description of the BLE controller

The ergonomic PAD BLE fits comfortably in the hand and offers a wide range of control configurations thanks to its various buttons and joystick.

This Bluetooth Low Energy (BLE) controller is available on all online shopping sites for a price starting at less than 6€ (at this price the delivery time is necessarily maximum). Enter the keywords "Manette VR R1 Bluetooth" in a search engine and you'll find the reference number. Initially intended for controlling music, taking selfies or navigating in a 3D world with virtual reality goggles, this pad has been diverted from its original remit to serve model railroaders, who will be able to control their layout without having to sit behind the computer.
Here are the characteristics of the controller provided by the manufacturer:
- it is Bluetooth 4.0 compatible and has a range of around 10 meters ;
- its built-in 180mAh lithium battery can be recharged via its mini USB port. Use of a 5V 1A charger is recommended. During charging, a red LED lights up. It goes out when charging is complete;
- low power consumption for long standby times;
- it weighs just 62 g ;
- its dimensions are 71 x 71 x 41 mm;
- a blue LED lights up during pairing and when changing Bluetooth compatibility mode;
- various buttons are available: enter, return, mode switch (side button M) and four function keys (A to D);
- a 360-degree joystick;
- a power on/off switch.
This joystick has several operating modes (A to D). Each mode emits different codes when the keys and joystick are operated, for interfacing with particular applications. The BLE joystick module uses mode C coding. After each power-up, this mode must be selected by pressing the M + C keys simultaneously, otherwise the responses sent by the joystick will be only partially consistent. To avoid forgetting to change modes, a reminder appears on the OLED display at start-up: "USE MODE C". This reminder disappears automatically once the import script has been run or the joystick has been manipulated.
BLE controller management menu
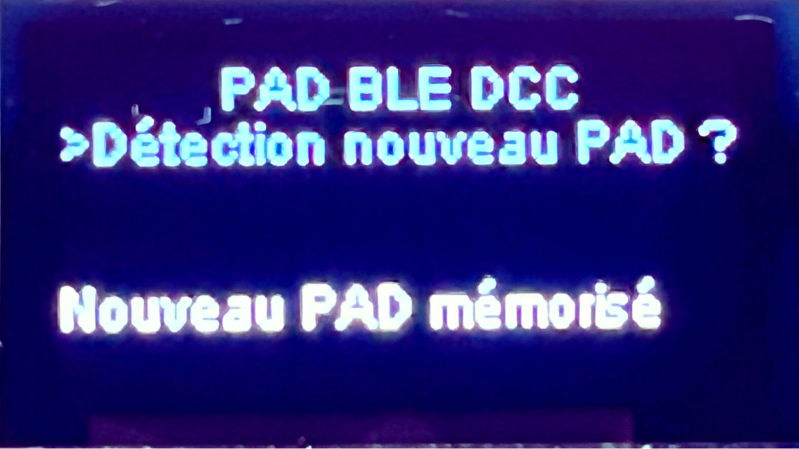
These first menus manage PAD registration and connection fully automatically. The PAD's MAC address is stored in the ESP32's EEPROM, so that the controller can be detected the next time it is rebooted. If you have two BLE joysticks, the procedure for detecting a new PAD enables you to quickly store the second PAD while the first is recharging, so you can continue to control the network's motrices without interruption.
At this stage, the joystick is not accessible to the module, so two push-buttons on the front panel (next and enter) are used to navigate the various PAD management menus.
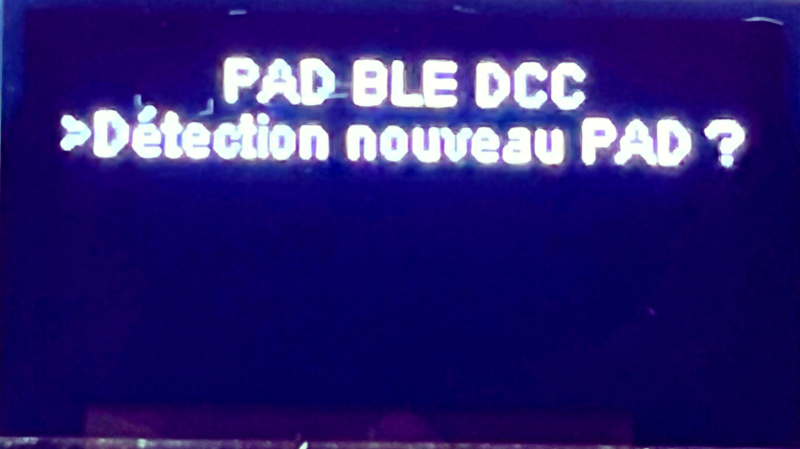
Three first-level menus are available:
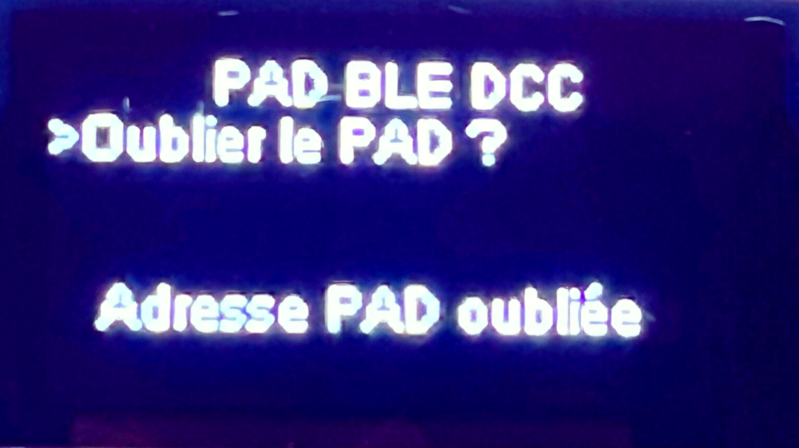
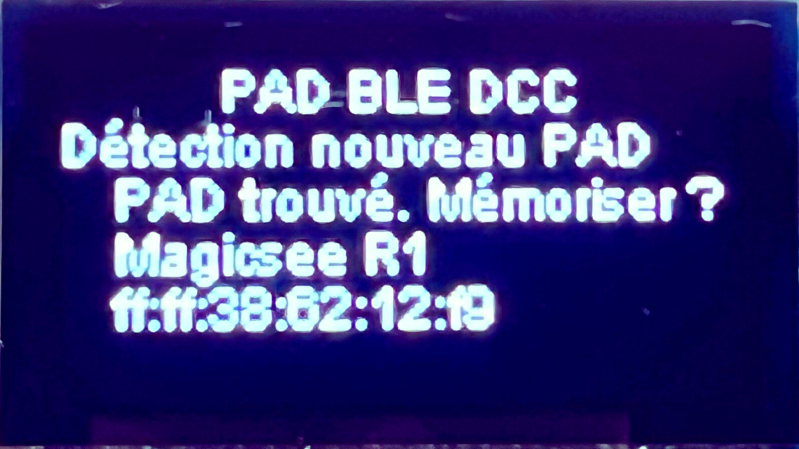
- PAD connection already stored in memory. This is the menu selected by default when a PAD is already known;
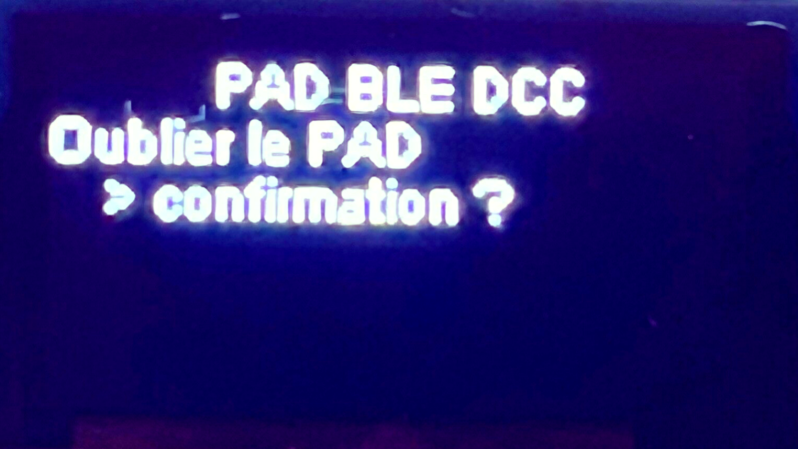
- forgetting a PAD allows you to dereference the memorized PAD;
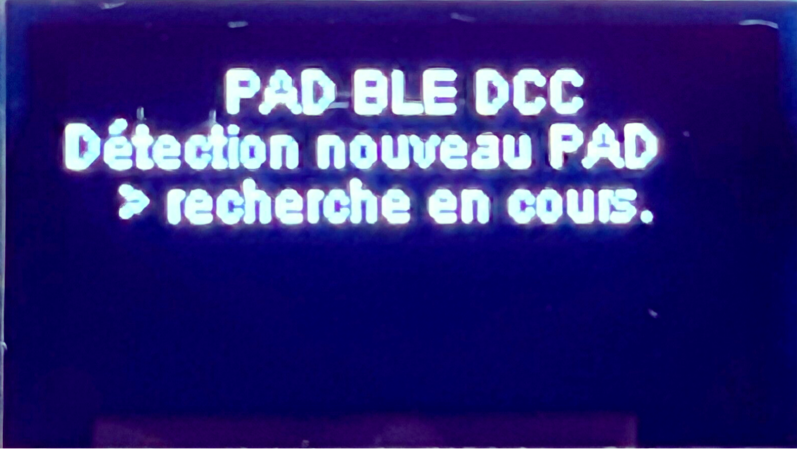
- search for a new PAD to register its address. This menu is used to save the PAD address on first use or when changing the joystick.
PAD connection
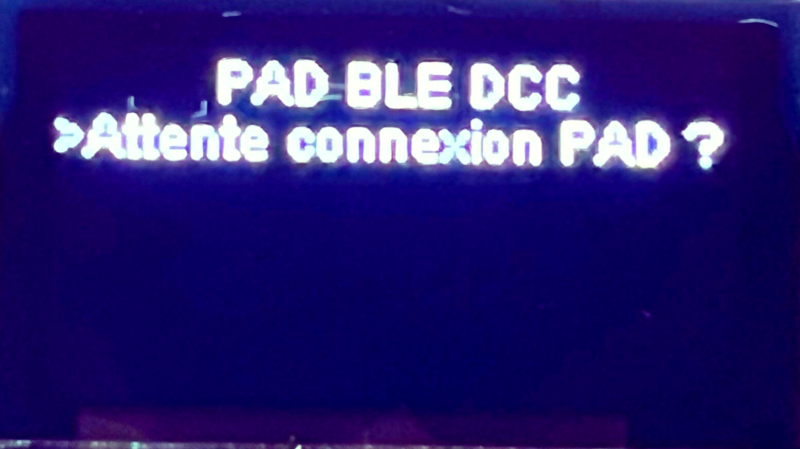
Next ►
Forgetting the PAD
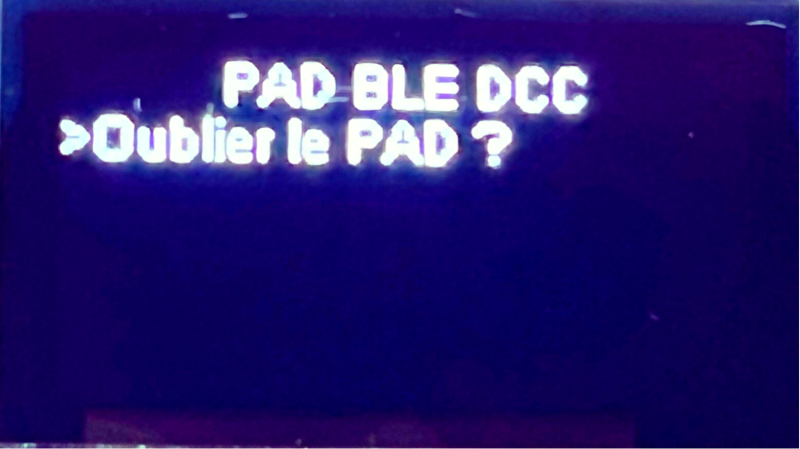
Next ►
New PAD
Enter ▼
Enter ▼
Enter ▼
◄ Start-up menu when the PAD is already memorized
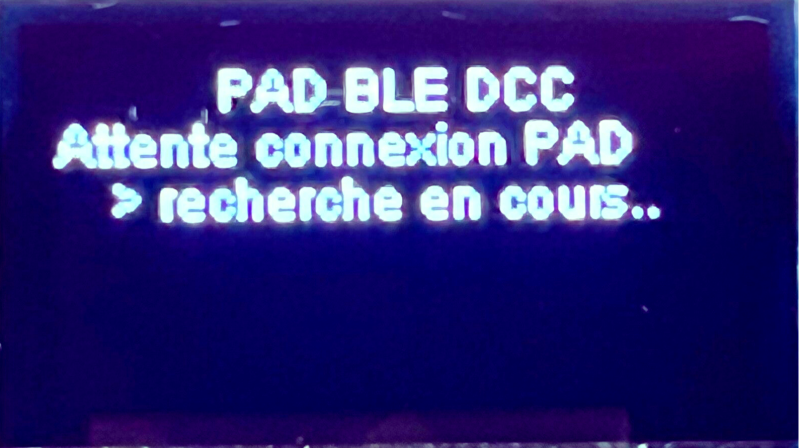
Upon detection ▼
Enter ▼
Activate joystick
(On)
Upon detection ▼
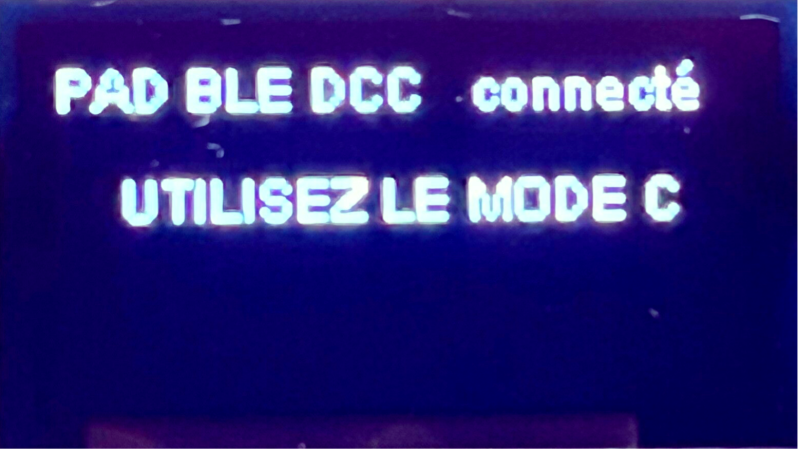
Switch to C mode
(M + C on the PAD)
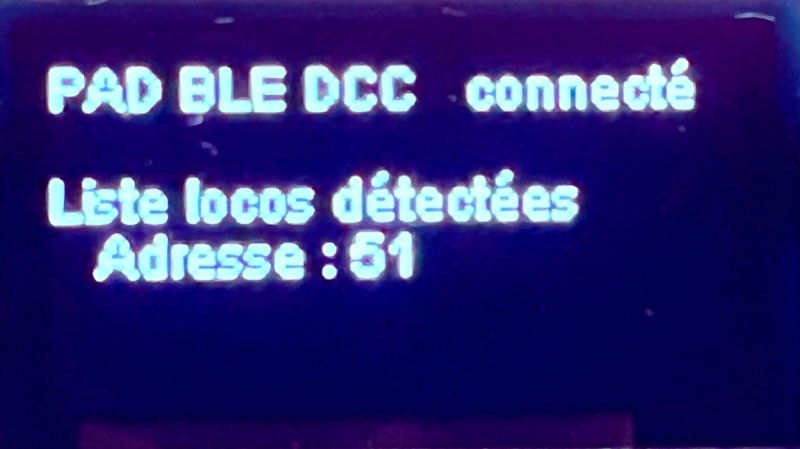
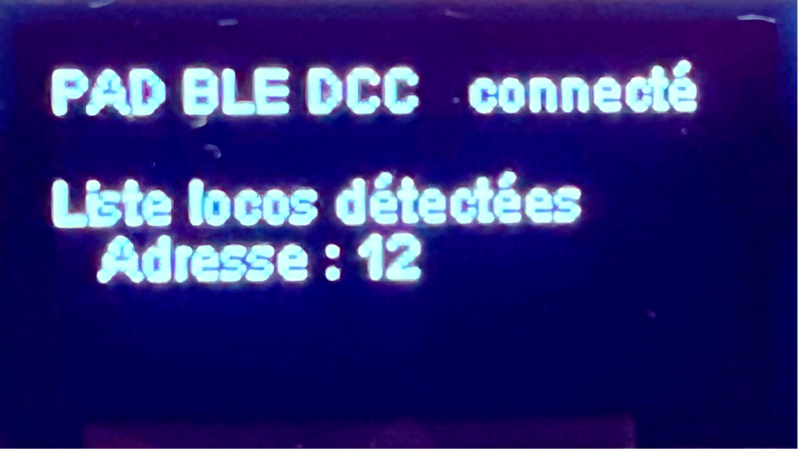
Transmission of loco addresses
▼
▲
◄ Next
Enter ▼

Using the PAD in pilot mode
▲
◄ Next
On subsequent power-ups, once the joystick address has been memorized, the PAD will automatically connect to the module as soon as it is activated.
A standard start-up using the BLE joystick therefore simply consists of :
- switch on the BLE joystick ;
- switch to C mode (press M and C simultaneously);
- upload the motrices list to the module: click on the JMRI script execution button to reference all motrices. This step can be performed at any time after the module has been powered up. The joystick does not need to be switched on to store locomotive addresses.
The drive control menu
This menu has two levels:
- the first allows you to select the locomotives to be memorized (four slots available);
- the second allows you to give instructions to these locomotives and quickly switch from one engine to another.

First-level commands :
- navigate to next loco address: right joystick
- store loco at location A, B, C or D: select + function A, B, C or D (automatically switches to level 2 at selected location)
- go to level 2 without saving: select + joystick down
Second-level controls :
- select a stored loco: function A, B, C or D
- change loco speed: joystick up or down
- change direction of travel: function A, B, C or D + selection
- select a function: left or right joystick
- activate or deactivate a function: enter
- go back to menu level 1: selection + joystick up
- start/stop DCC signal: press all four functions simultaneously
Example of use of the first menu level
This first level of the menu allows you to scroll through the drive addresses and memorize those you wish to control. Four slots are available (A to D) for direct access to control parameters (direction, speed and 29 functions).
Right joystick ►
Right joystick ►
Selection + joystick down ▼
Changing menu levels without saving
Selection + up joystick ▲
Selection + Function A to D ▼
store the selected loco in a location on the second level of the control menu
Example of use of the second level of the control menu: interact with the four drives stored in slots A to D.
To select a slot, simply press the corresponding function button.
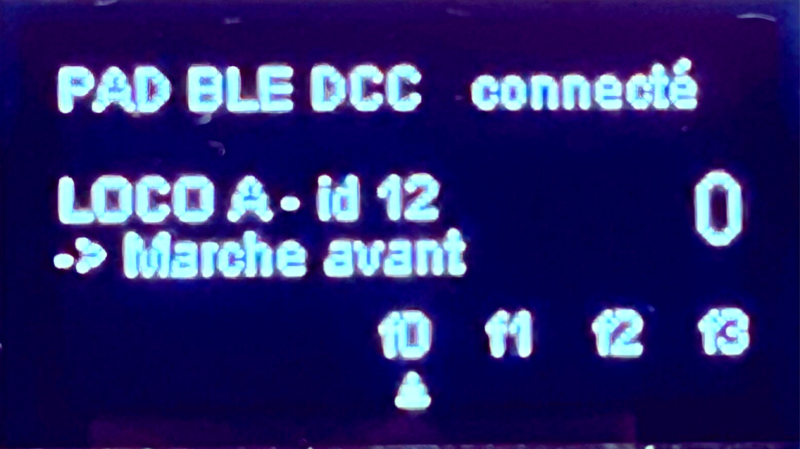
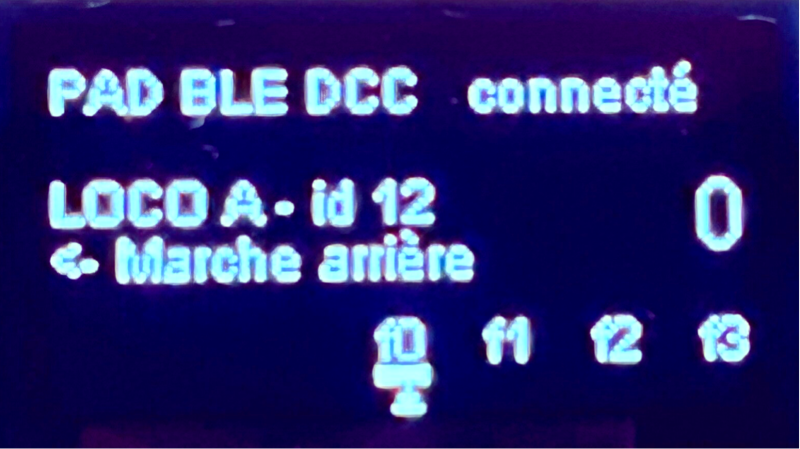
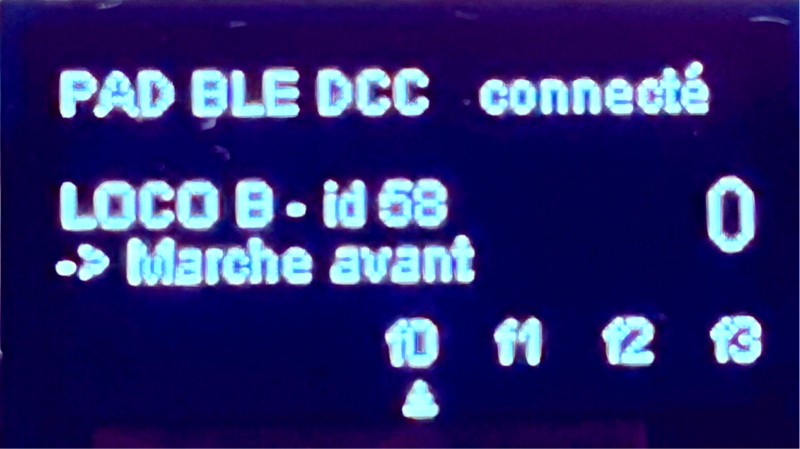
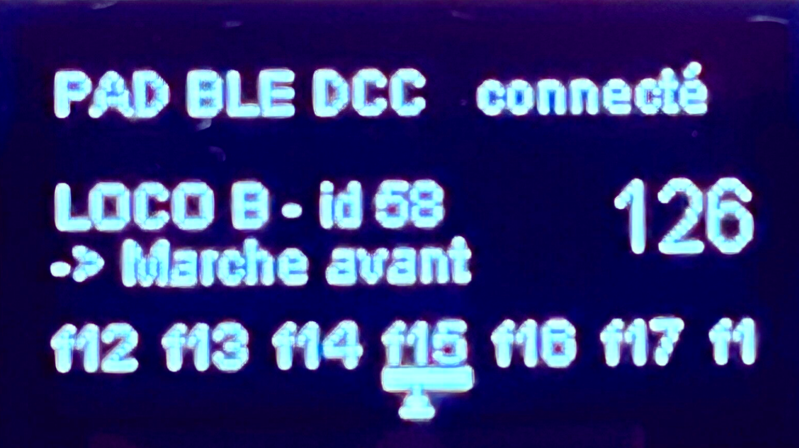
1) Default display of the first loco stored (forward, speed 0 and no active function).
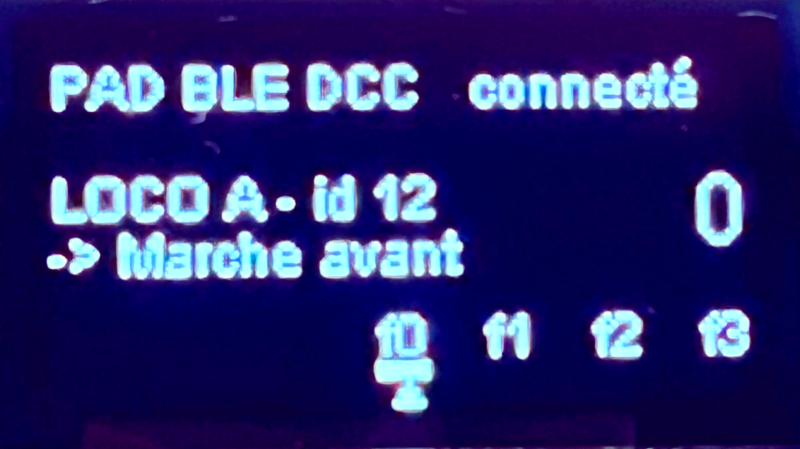
2) Pressing the enter button activates or deactivates the function positioned on the arrow (f0 = lights).
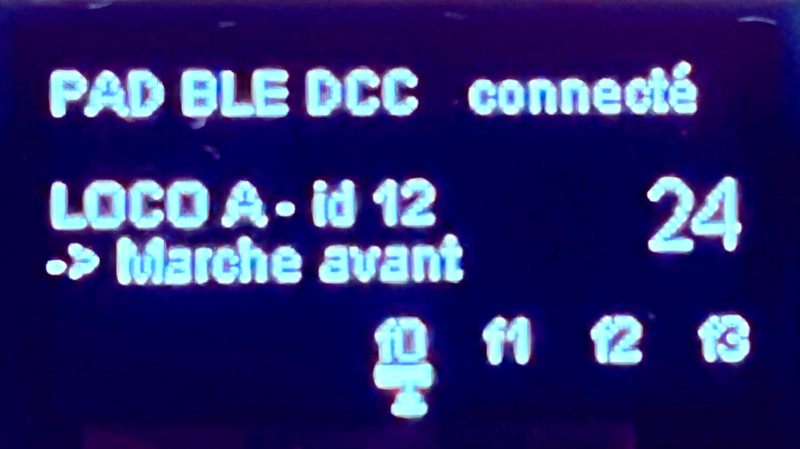
3) Up/down joystick to increase/decrease loco forward speed (24/126).
4) Button A + select changes the direction of travel of loco A and sets the speed to 0.
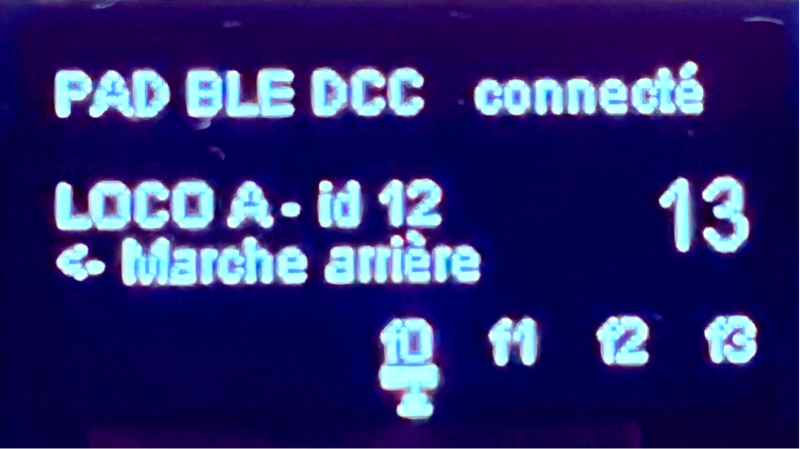
5) Joystick up or down to increase or decrease loco speed in reverse (13/126).
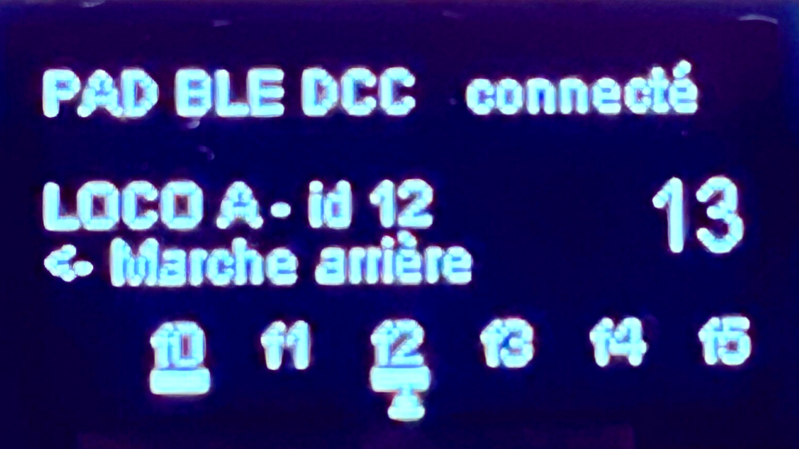
6) Left or right joystick to select a function and enter button to activate or deactivate the function.
Memorization of another motor
- From the control menu, press select + up joystick to return to the loco selection menu.
- Scroll through the addresses with the right joystick.
- Press selection + memory location (A to D) to store another loco.
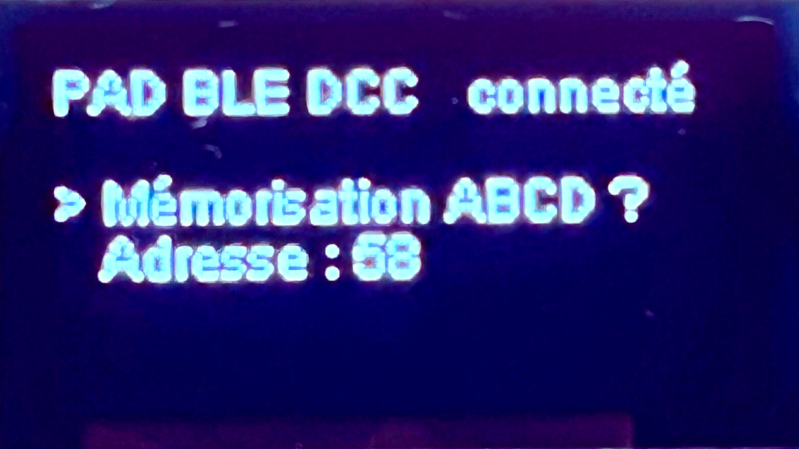
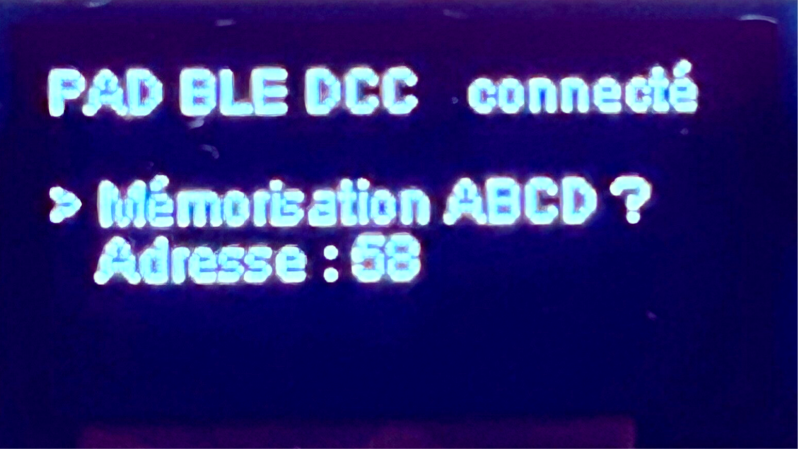
Select button + button B ►
Control loco address 58 in speed, direction and functions.
JMRI script installation (DecoderPro)
In order to quickly transfer all locomotive characteristics to the BLE joystick module, a script will be executed which will run through all the locomotives described in JMRI and transmit the data to the serial port.
For quick access to this script, an execution button will be installed on DecoderPro's main interface. Clicking on this button executes the script, transferring all data to the serial port and storing it in the BLE controller module.
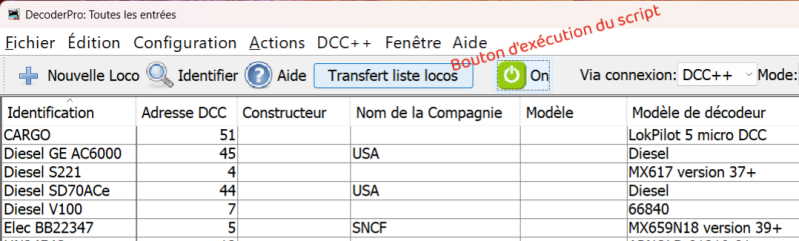
This principle avoids having to declare the same locomotive several times. DecoderPro will be used as the "reference" for our engines. The declaration of a new locomotive or an update to an existing locomotive takes place in just one place: DecoderPro.
Writing in progress...